December 30, 2006

When first you don't succeed...

...alter the recipe and try again. If it still doesn't seem right, consult an expert for advice and follow as instructed.... 
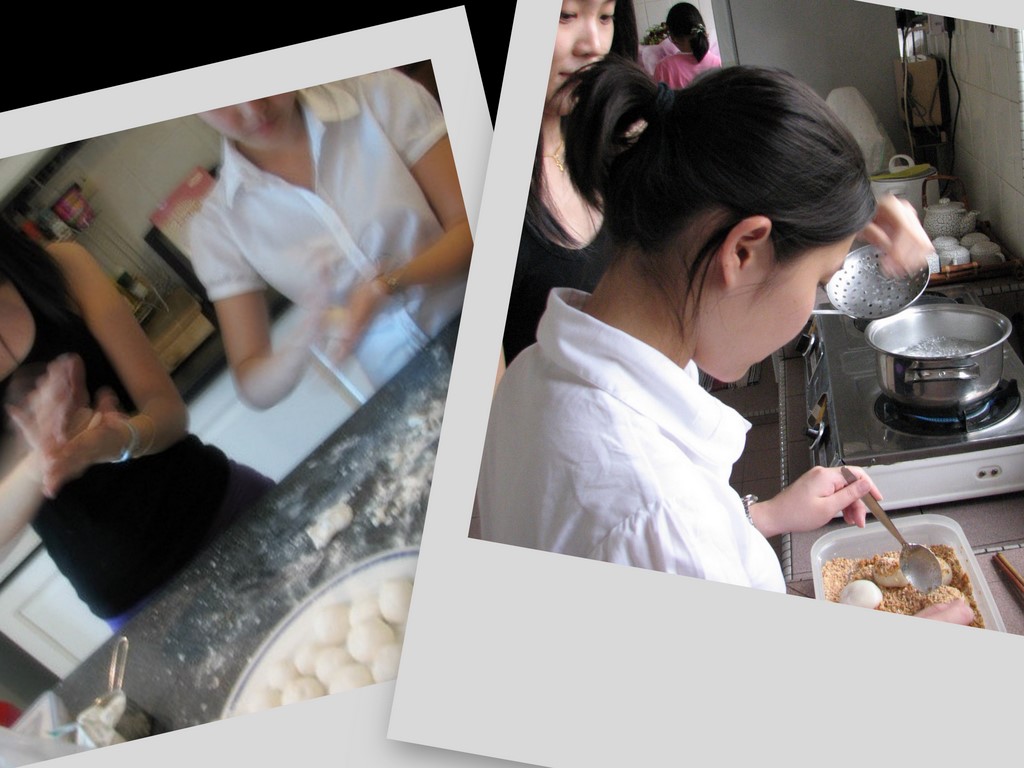
When all else fails...watch expert make batter;copy recipe notes; bring batter home..and make some in the morning *giggle*...I'm sorry, I do admit.. I resort to cheating when I'm desperate ;)

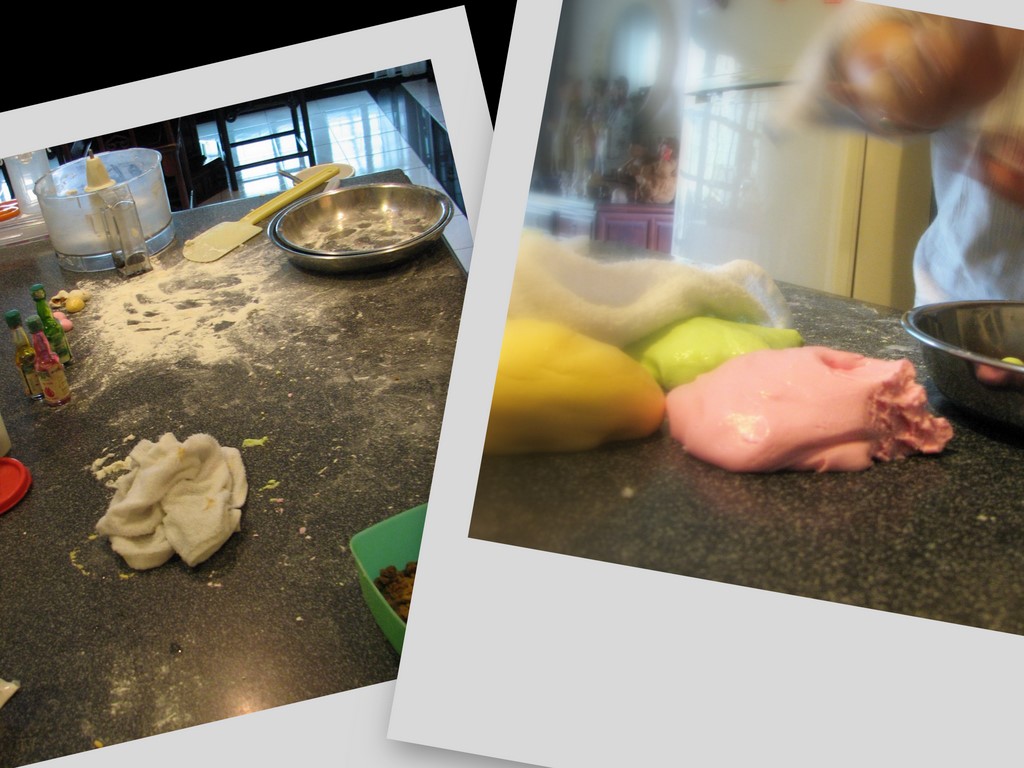
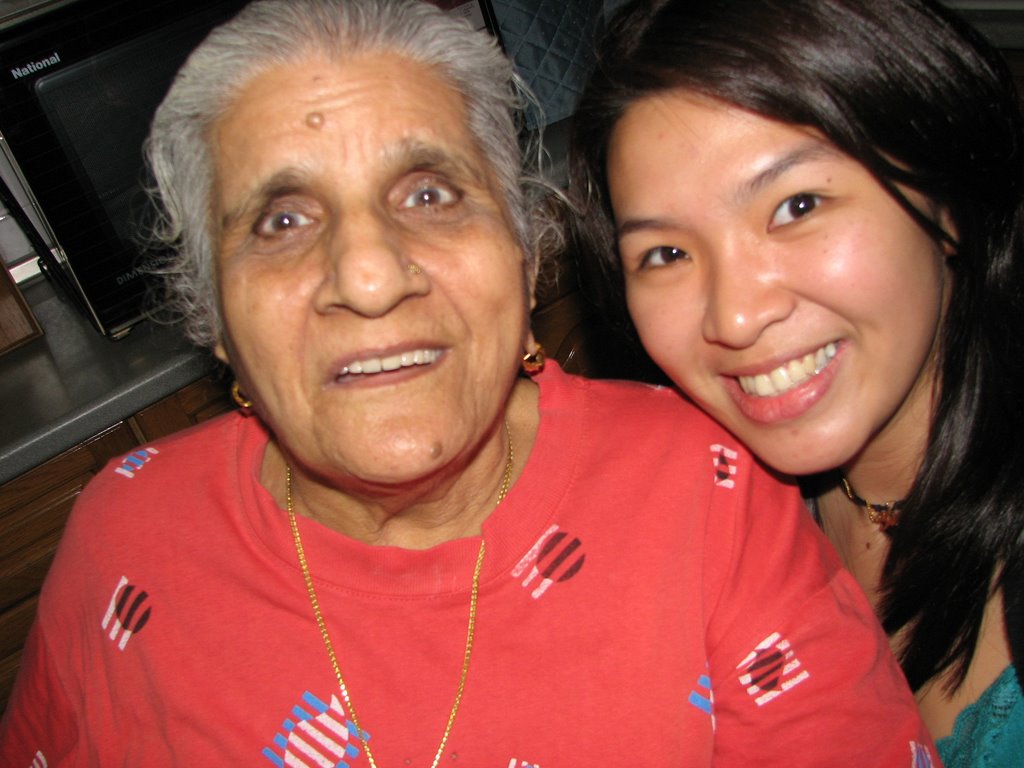
I apologize for the late post. I know I irresponsibly promised everyone the recipe 2 days ago...*blush*. I went a long way for these precious recipe proportions...but just to cut the long story short, I owe it all to Pinky's grandma and Kak Ti. They've been making delicious Indian "appoms" for a long time...and after many attempts at difficult batter and sticky unseasoned mini iron woks; I called out for help.
Pinky's family was very helpful with tips+old wives tales on seasoning brand new mini appom pans to make it them "non-stick" and more workable; but after many attempts and long afternoons frying coconut and coating its surface with grease. It apparently takes MONThs to perfect! They decided to ease my suffering by lending me their family's old beautifully seasoned pan. Not only was that thoughtful enough;...Pinky's grandma and aunt actually took the trouble to purchase a modern teflon coated appom wok for me from their local Indian store! I was overwhelmed. Everyone in her family is so sweet~ 
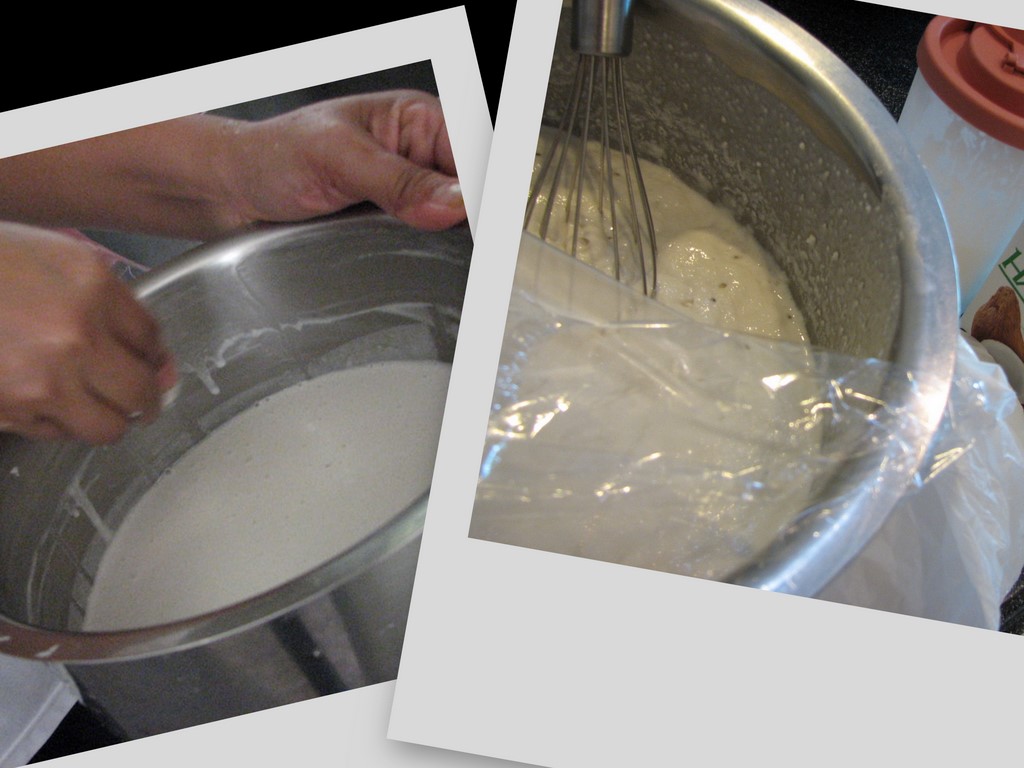
Kak Ti; helped me with the recipe proportions and I took notes attentively as she got her hands dirty for me. The batter she made worked perfectly and I brought some of the appom I made that afternoon to their place for everyone to have a taste of what I've done. I really hope they weren't too disappointed with how the lil Chinese girl's appoms turned out! *laughs*
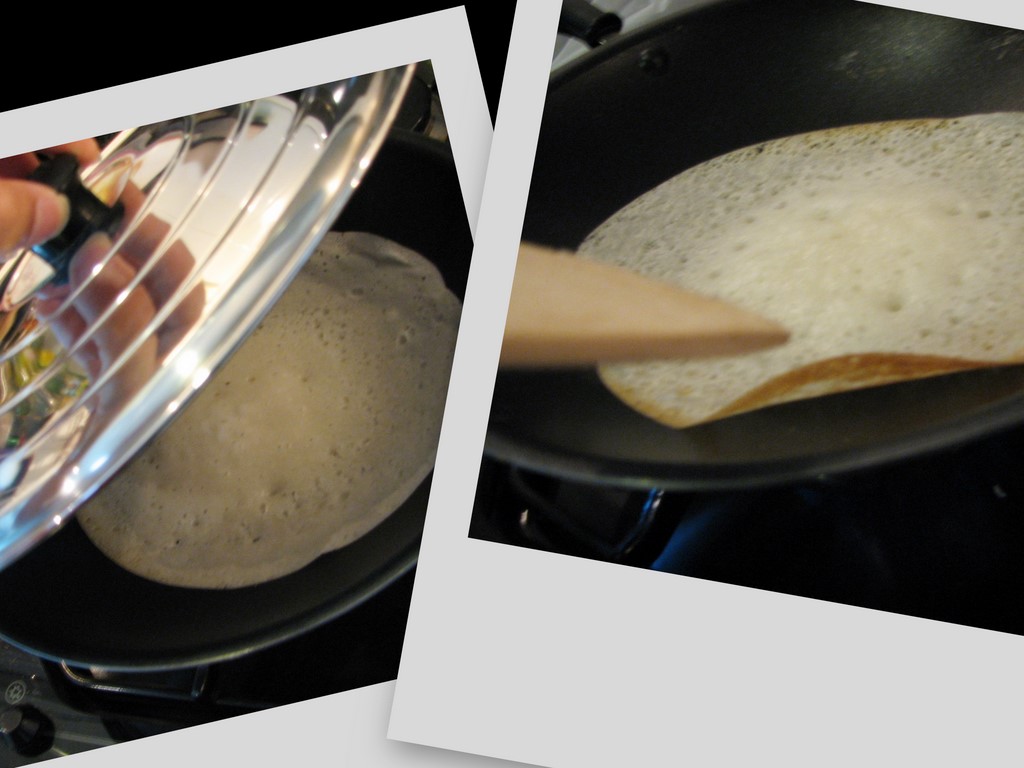
My parents were pretty happy munching away on crisp piping hot appoms straight out of the pan! Drizzle on a spoon of freshly squeezed sweet coconut milk....dig in (Indian style)~ *wink* ...MmMmm....*licks fingers* perfect for a tea time snack.
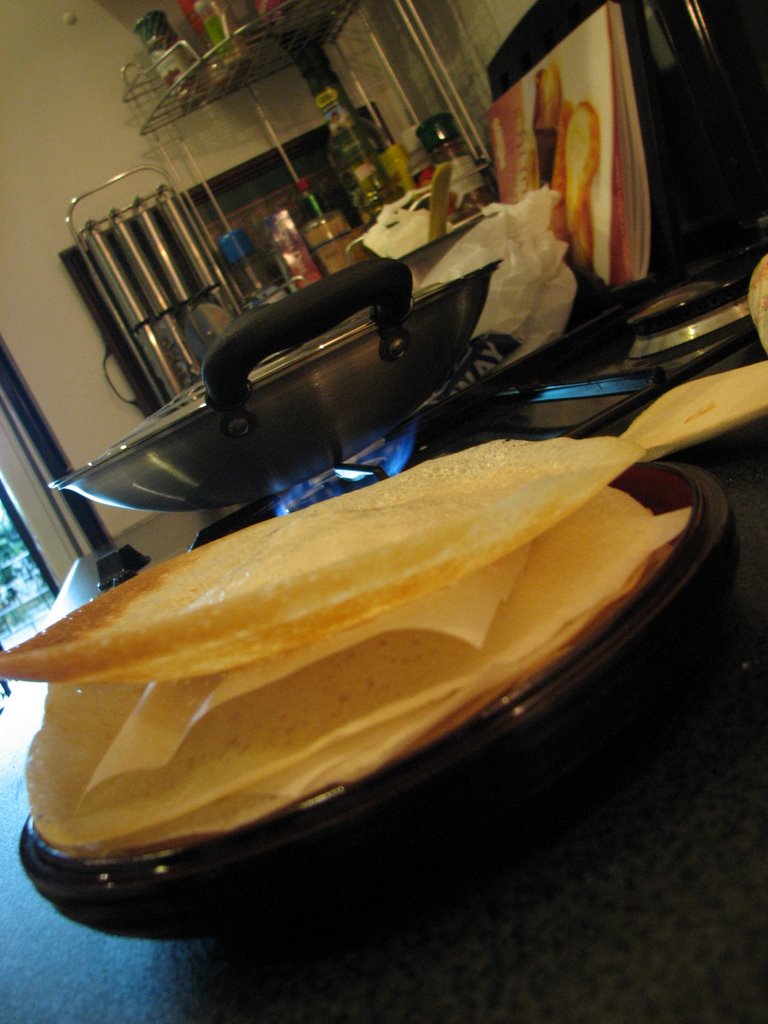
Pinky's grandma also mentioned that appom can be eaten savoury with curry! I'll try that next time~

Blend: 1/2 tsp yeast+ 1/2 cup warm water+ 2 1/2 heaped tbsp's of cooked rice.
500gms rice flour
3 tbsp sugar (or to taste)
1 tsp salt
Mix all ingredients in a large metal bowl and knead with your fingers till well combined. Cover and leave to rest overnight.

Whisk in 450ml coconut milk just before making appoms.
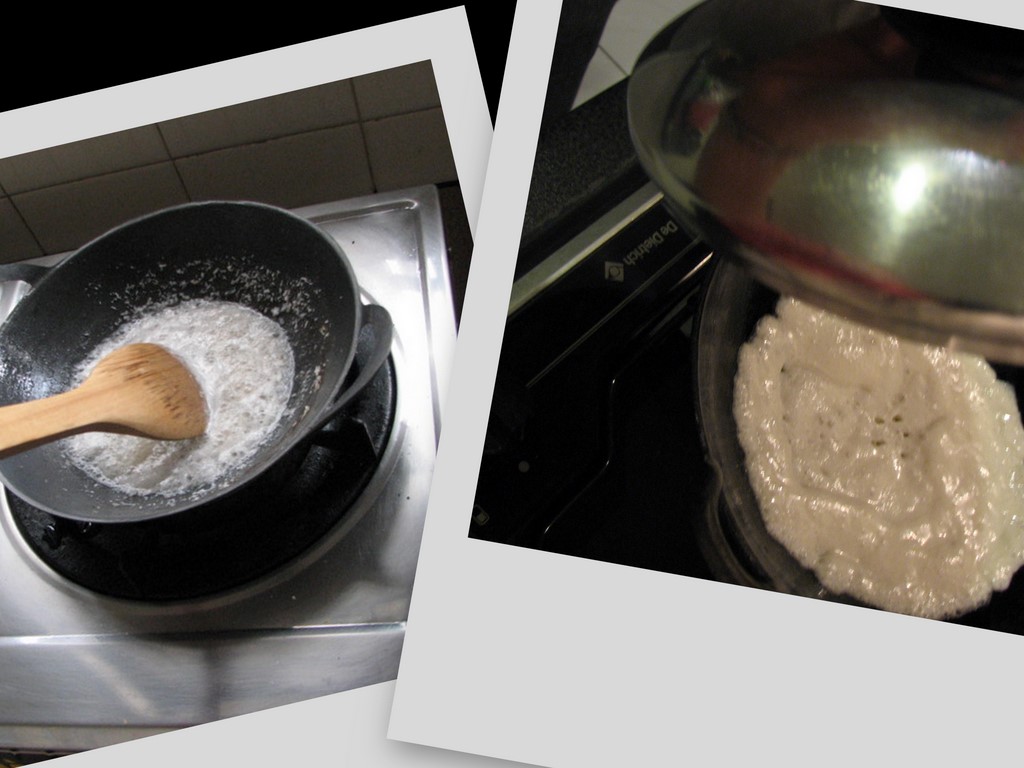
Heat mini appom wok well on medium-low heat and spoon in 1/4 cup batter into the center. Swiftly swirl the pan in a circular motion with your wrist a rest wok on low flames with the lid on. cook for 1-2 minutes till center is cooked through with a cushion-like consistency. It should be thicker than the corners and fairly soft in the center. For crisp corners; only swirl the pan in a circle once to make a thin coating around the border. Remove lid and cook for an extra minute.
When the edges begin to crisp and brown slightly; briskly flip the appom out with a wooden spatula and serve immediately with a spoon of coconut syrup on the side~

Coconut syrup: 2 tbps's castor sugar diluted in 100ml's fresh coconut milk.

December 27, 2006

What does she do in a secluded island paradise?...

She reads about food :) *giggle*....has her fingers permanently clicking at her beloved camera's shutter release button....and has her nose up scouting for new culinary inspirations ;). *naturally~ heheOur family vacation at the Pangkor Island resort last Xmas weekend was lots of fun for everyone. I got some time away from the kitchen and running errands to just sit back in the sun with a book. I haven't read all of it yet..but so far; "The Hungry Years" by William Leith is hilarious!
The trip by ferry from "Lumut' to the island resort was ...erm...difficult~ Haha..it was a public holiday and families were out full-force with kids...backpacks.. etc to have a weekend trip at tiny Islands close-by.
The queue and the ferry ride there was made more convenient and less stuffy with priority seating for guests at the Resort. *thank goodness*~ We could have been standing there for hours if not.
When we finally got there...welcome drinks were served and jolly christmas carols were sung.everything was smooth sailing...plenty of activities for everyone!
A good stretch of soft fine sand, beautiful views and many shady spots with lush greenery to just lie back. Everyone got to have a nice relaxing weekend~we had some precious family "bonding" time and celebrated Mom and Dad's wedding anniversary on Xmas eve together.At dinner...the resort was beautifully lit and the buffet spread looked pretty impressive. I was more interested in taking photographs of the displays more than eating my dinner! Haha.


A dessert stall making South Indian Appom was absolutely sensational!!~~ definitely worth a special mention. :P The lady had our family going back for seconds...thirds and forths! My aunts and I worked our family charm....and came home with the recipe~ *giggle* I'm trying it out this afternoon...Hope to have a write up about it by tomorrow; so keep your eyes peeled *wink*

December 23, 2006

MeRRy XmAS to ALL!

My family and I will be off to a tiny Island resort for the Christmas weekend. Shall be back and blogging in a couple of days.... till then...here's a moreish quick-mix cake recipe for those last minute xmas gifts ;)Moist Mocha Loaves
1 tbsp cocoa powder+2 tbsp strong coffee granules diluted in 2 tbsp hot water.
225g butter softened
210g castor sugar
225g self raising flour
4 eggs
1 tsp baking powder

Mix all ingredients with an electric mixer on high for 2-3 minutes till a smooth/creamy batter is formed. Divide into 3 9 inch loaf tins/cases. Bake in preheated 160 degree oven for 30-40 minutes or until skewer comes out clean. Leave to cool on wire rack.Frosting :
50g butter (softened)
3 tbsp milk
100g milk chocolate
175g icing sugar
Melt chocolate, butter and milk in a bowl over simmering hot water. Stir till smooth. Sift in icing sugar and beat till smooth and thick. Spread over cooled cakes. Dust with icing sugar or decorate to match festive season~...
I used dessicated coconut on mine to resemble snow flakes...add on a coupe of modeled fondant penguins, candy canes and xmas trees.

December 22, 2006

Celebrating "Dong Zhi" @ home

The Winter Solstice Festival in English; Dong Zhi, is a Chinese tradition our Malaysian family take pretty seriously.
It's when the whole family comes together to spend an evening catching up, discussing family matters.....and to just spend time "re-bonding"~ Call it "Thanksgiving" if you must. We honour our ancestors at the altar with offerings..and do very basic prayers during the day. For my family and I; it's not really so much about religion, it's our Chinese culture and heritage more than anything.

Here's a detailed description of "Dong zhi":
Dong Zhi is the second most important festival of the Chinese calendar. Celebrated on the longest night of the year, Dong Zhi is the day when sunshine is weakest and daylight shortest. The coming of winter is celebrated by families and is traditionally the time when farmers and fishermen gather food in preparation for the coming cold season. It is also a time for family reunions.
This celebration can be traced to the Chinese belief in yin and yang, which represent balance and harmony in life. It is believed that the yin qualities of darkness and cold are at their most powerful at this time, but it is also the turning point, giving way to the light and warmth of yang. For this reason, the Dong Zhi Festival is a time for optimism.
Our annual family reunion dinner's have always been home-cooked meals and "tong-yuen" desserts; but due to increasingly busy lifestyles and deteriorating health of the best chefs in the family; we had our dinner at a Chinese Restaurant. It didn't feel quite the same...*sad*... Mom and I decided to have our "tong-yuen" dessert homemade at least. Tong Yuen= Glutinous rice dumplings (filling= palm sugar) Served in a ginger syrup soup. It was fun spending the evening with mom rolling tong yuens for the family. Here's mom's secret recipe to silky smooth and delicious Tong yuen's.

3 cups glutinous rice flour
approx 1 cup(pandan liquid)
filling= tiny broken pieces of palm sugar (optional)
Pandan= Screwpine leaves. Make pandan liquid by boiling 2 cups water with 2 knotted pandan leaves and a 3 inch piece of rock sugar. Allow to cool overnight and knead for at least 8-10 minutes with glutinous rice flour to create a smooth dough. Divide and color dough accordingly. The dough dries up fast, cover unused dough with damp cloth while rolling tong yuens. Drop rolled tong yuens in small batches into boiling water. They are cooked when they begin floating on the water surface. Scoop out and briskly dunk into a bowl of cold water. Drain well and serve with ginger soup.
**Ginger soup made with = Water, rock sugar, pieces of old ginger root, knotted pandan leaves.

I had my dear friends Juli and Shian Yi over 2 days ago..and we had a fun afternoon playing with some dough too! Here's another modern variation of tong yuen's to make.
They should be eaten within the hour if possible! Haha..they dry up pretty quickly when they aren't served with soup.*Dough and cooking methods are similar to the recipe above.
(variation: substitute 1/2 of the dough liquid with coconut milk)
*Filling= 3/4 cup Crunchy peanut butter+1/4 cup icing sugar+ 2 tbsp crushed roasted peanuts

Mix well and leave in the refrigerator for at least 2-3 hours. Shape into tiny balls and freeze to maintain shape.
Wrap with tong yuen dough and cook similarly. Dust fingers well when handling sticky dough.
Instead of the soup; Roll cooked tong yuens in crushed peanuts.

Celebrating Mom's birthday...again!?

Mom's actual birthdate is the 21st of Dec. A special family dinner was arranged at Mom's favourite restaurant and I baked an impromptu cake for the occasion.
I only had an afternoon to bake and frost; couldn't make anything too extravagant...but Mom was happy that I actually took the trouble to try! It turned out looking awesome; despite the 'hasty' decorative efforts~ Everyone was impressed!..I made a quick border for the cake out of ribbon+ marshmallows and topped the cake with fondant roses and small flower details. I molded 5-6 roses and dusted them with petal dust, used a flower cutter for smaller darker shades of pink and quickly rolled spirals of red fondant to form mini "abstract" looking roses.I knew Mom and most of us at the table simply loved whipped cream. I layered the cake with freshly whipped cream and topped it with berries and cherries to match. The texture of the sponge layers did not turn out as I expected...but everyone at the table was satisfied with how it tasted. Dad was not happy...he kept comparing it to the coffee walnut cake he loved which I made for Saturday's party; he's just picky and hard to please *meh* LOL.
Here's the recipe for those who want to give it a go. It's a good recipe to have when you're in a hurry and don't have time to wait for butter to defrost :)

Chocolate sponge + cream layers
3 eggs (large)
1/2 cup castor sugar
1/4 cup cornflour
1/4 cup self raising flour
1/4cup plain flour
2 tbsp cocoa powder
2 tbsp baileys/tia maria
2 tbsp milk
500 ml whipping cream
200 gms white chocolate(melted)- break into 2 inch pieces and microwave on high for 40 seconds. Stir till smooth.

Beat eggs in an electric mixer till creamy and pale. Add in sugar a little at a time till mixture is fluffy and sugar is dissolved. Lightly fold in sifted flours and cocoa powder. Bake in lightly greased 9 inch springform round tin for 25 minutes in preheated 160degree oven. Remove from tin and allow to cool before slicing into 3 layers. Whip cream till thick. Add melted chocolate in a thin stream, beating as you go. Continue beating till fairly stiff peaks form.
When completely cooled, layer cake with cream and brush sponge layers with mixture of milk and alcohol. Frost sides with cream and allow to set in the refrigerator for at least 2-3 hours. Top with decorative bits and pretty ribbons :).